Blog to Tweet Generator
Last updated: November 18, 2024
Welcome to the Blog to Tweet Generator guide. This tool helps you transform your blog content into engaging tweets tailored for your Twitter audience, leveraging AI Magicx's advanced capabilities to maximize your social media impact and save you valuable time.
What is the Blog to Tweet Generator?
The Blog to Tweet Generator by AI Magicx is a tool designed to help you quickly create impactful tweets from your blog content. By entering your article text, selecting keywords, and adjusting options like tone, language, and creativity level, the generator produces tweets that capture key points from your blog and connect effectively with your Twitter audience. Whether you're a content creator, marketer, or business owner, this tool streamlines your social media strategy by ensuring your tweets are both engaging and aligned with your content goals.
Step-by-Step Guide
Follow these steps to convert your blog content into engaging tweets using AI Magicx Blog to Tweet Generator:
Step 1: Log in to Your AI Magicx Account
- Access AI Magicx Website:
- Open your web browser and navigate to the AI Magicx website.
- Sign In:

- Click on the Sign In button located at the top-right corner of the homepage.
- Enter your registered email address and password, then click Login.
- If you don’t have an account, click on Sign Up to create a new account.
Step 2: Access the AI Library
- Navigate to the Dashboard:

- After logging in, you will be directed to the AI Magicx Dashboard.
- Find the AI Library:
- On the Dashboard, locate and click on the AI Library option to view the available tools.
Step 3: Open the Blog to Tweet Generator Tool
- Navigate to Social Media:
- In the left sidebar, go to the Social Media section.
- Select Blog to Tweet Generator:

- Click on Blog to Tweet to open the Blog to Tweet Generator tool interface.
Step 4: Enter Your Article Text
- Article Text:

- In the 'Article Text' field, paste the blog content or key points from the blog post that you want to turn into tweets.
- Example: Paste the main points or a summary of your blog post to provide context for the tweet generation.
Step 5: Add Keywords (Optional)
- Keywords:

- In the 'Keywords' field, enter any specific keywords separated by commas.
- Example: "Digital Marketing, SEO, Content Strategy"
- These keywords help the tool emphasize relevant terms in the generated tweets, ensuring they align with your blog's focus.
Step 6: Set the Number of Tweets
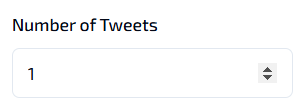
- Number of Tweets:

- In the 'Number of Tweets' field, specify how many tweets you want to generate from your blog content.
- Example: Entering "3" will generate three different tweet suggestions.
- This allows you to create a batch of tweets for various aspects of your blog post or for different posting times.
Step 7: Choose the Tone of Voice
- Tone of Voice:

- In the 'Tone of Voice' drop-down menu, select the tone you want for your tweets.
- Available options include:
- Professional: For formal and business-oriented communications.
- Friendly: For approachable and warm interactions.
- Inspirational: For motivating and encouraging content.
- Casual: For relaxed and informal posts.
- Example: Choose "Professional" if you’re targeting a business audience, or "Friendly" for a more approachable tone.
- Selecting the appropriate tone ensures that the generated tweets resonate with your target audience and align with your brand's personality.
Step 8: Select the Language
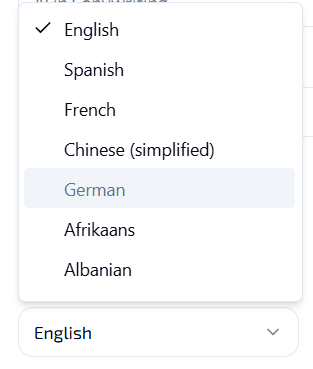
- Language:

- In the 'Language' drop-down menu, choose the language you want your tweet to be generated in.
- Example: English, Spanish, French, etc.
- This allows you to cater to a diverse audience or target specific linguistic groups.
Step 9: Set the Creativity Level
- Creativity Level:

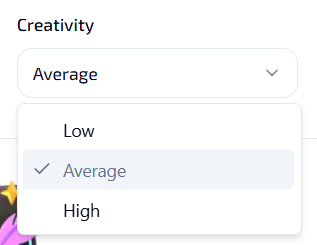
- Under the 'Creativity' setting, select your preferred creativity level.
- Low: Generates straightforward and concise tweets with minimal variation.
- Average: Balances creativity with clarity, offering engaging yet understandable tweets.
- High: Produces highly creative and unique tweets that stand out.
- Example: A higher creativity level may result in more innovative and unique captions, while a lower level will produce more straightforward and concise wording.
- Selecting the appropriate creativity level helps tailor the tweets to your desired style and audience engagement.
- Under the 'Creativity' setting, select your preferred creativity level.
Step 10: (Optional) Specify the Target Audience
- Target Audience:

- In the 'Target Audience' field, you can add specific groups or demographics for the tweet.
- Example: "Content creators, SEO agencies."
- Defining your target audience helps the AI generate tweets that resonate more effectively with your intended followers.
Step 11: Generate the Tweet
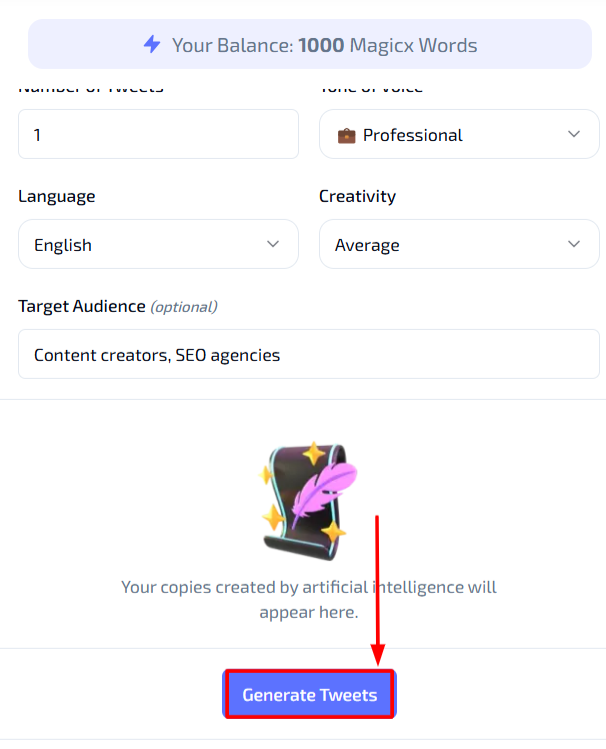
- Generate Tweets:

- Once all fields are filled, click on the 'Generate Tweets' button at the bottom of the screen.
- The Blog to Tweet Generator will process your inputs and display the AI-generated tweets below.
- Review the generated tweets to ensure they meet your requirements.
- If necessary, make further adjustments or regenerate the tweets with different settings to achieve the desired outcome.
- Copy the tweet(s) for use in your Twitter account or integrate them directly into your social media management tool.
Additional Resources
- Tutorial Video: Watch the Tutorial
Last updated on 2024-11-18
